Friday, March 29, 2013

REVIEW: DollarNailArt.com !!

Posted by Stephzilla at 8:32 PM 1 comments
Hey guys!

Sorry it's been a while since I posted anything, but I wasn't really inspired to and I didn't want to give birth to a boring crap blog post. 

Last week, I received an order from dollarnailart.com ! For those who don't know, dollar nail art is basically nail stuff for a dollar (no shizz Sherlock). They have studs, foils, striping tape, spikes, lots of inexpensive nail adornments. This is how everything was packed:

Da Box, shipped via USPS
It was packed up very nicely, some of the more delicate items were wrapped up nicely as well. They also included instructions as to how to use their products, as well as a thank you letter. Shipping for me only took like 4-5 days (shipped from Florida). 

I ended up picking out mostly nail foils (bright and shiny is my middle name!) as well as some more studs and odds and ends. Big tip with this store; YOU CAN'T BUY ANY LESS THAN 25 DOLLARS USD PER ORDER. This is I think to keep costs down, which I don't have a problem with because I could always use more stuff.

Let's start with the studs:

$8.50 3mmx3mm 10 color square studs

I got more studs! I love studs on nails so I bought this pack. They are in 10 colors, everything from gold to sky blue. You get 360 total, 36 in each color. 

bigger shot

I bought one vial of nail glitter in "Pink Sherbert". It's pink with iridescent purple hex glitter in it. I don't know how I feel about it. 

$1.00

I also got mini red hearts, kind of feel like for a dollar there should be more than 10 but hey. 


I also got pink mylar metallic pink hearts, they would match nicely with my bows from bornprettystore.


I also bought 50pc of striping tape, mostly for masking and when I'm too lazy to use a nail striper. These are just little tiny strips of tape for your nails, and you stick them on like a sticker.


Now for the bulk of my order......

NAIL FOILS (bickety BAM!)


I bought 13. I know it sounds crazy, but I'm like a magpie. I LOVE shiny things! Nail foil is basically a thin layer of foil that you place over your nail to make it really shiny. I will be doing a tutorial on how to apply it for my next post, but if you remember how to peel the foil off a gum wrapper (here's a video to remind you CLICK ME ) and stick it to your nails.

For every 6 rolls you buy of foil (5 feet of foil per vial), you get a free bottle of nail foil glue. You'd need the glue to apply the foil, so it's nice how they give you enough glue to last a long time.

It smells like a PPA (perfect paper adhesive) glue. Weird. 
The colors:
Night Leopard- Metallic purple with leopard spots on it.  I bought this because it reminds me of Lady Gaga's "Dance In The Dark" outfit from the Monster Ball.
Pewter- Looks like a brushed silver.
Looks like Minx!
Silver Spectrum-Vertical holographic rainbow goodness.
Ice-Blue Crush- This one I thought was silver, but was blue. 
English Rose- I like it, but it's one of the most difficult to use.
It's pink flowers.
Silver Dots- Silver with holographic hex glitter spots in it. Disco Heaven!
Black Raven- matte black. Might come in handy.
Wildberry Flash- Horizontal gradient of blue, purple, and pink.
First one I used, amazing color.
Fiber Optics- Silver with holographic horizontal stripes. 
Laser Optics- Purple with holographic vertical stripes. 
Opal Glitter- Mostly clear with opal circular specks in it.                                                      
Gold- Metallic gold. Like Minx, but less money.
Opal Swirl- This will look AMAZING on black. It looks like a rainbow oil slick.

I'M SORRY THIS IS SO LONG. I tried to make it so it wasn't so long but the type editor on this sucks. Overall I'm happy with my purchase, there are a few things I'm not crazy about but it's okay. I like how with a little finesse, I can make the popular Minx nails for a small fraction of the price, the foil however doesn't last that long. The tips wear down a bit quick, but it's a dollar so for cheap thrills, it's cool. I will buy again in the future, but not for a while since you kind of have to buy tons to get them to ship to you.

I hope you like this review, be back soon with a mani of the week!

Friday, March 22, 2013

REVIEW: BornPrettyStore

Posted by Stephzilla at 8:17 PM 0 comments
Hey guys!

In the beginning of March, I put in an order at bornprettystore.com . Tons of beauty bloggers before me have posted reviews and things on their blogs, so I decided to buy a few things and give them a test drive. Keep in mind that I bought all these things with my own money, and am not being paid to give you an opinion. All honesty, all the time!

First off, when you go to the website, the amount of things they carry is awesome! They have everything from nail stuff to makeup, accessories, phone stuff, so many things! It's rather extensive and impressive. 

This particular package came all the way from Singpore! It's the farthest I have ever received a package from. Look at how pretty the postage is and things!


Traveler's palm? 

Custom Slip
I don't have any pictures of how everything looked in the package, but everything was packaged extremely well. I like how they actually took time and rolled things in foam, etc. Since it came from Singapore, it took a bit to get to my house. I put in the order March 2nd, and didn't get it til the 21st. If you can wait, it's definitely worth it! If you need items for a specific event, make sure to put in your order at least 3 weeks in advance. All of their shipping is FREE too! 

Card included in the package. I'm not receiving any compensation, promise!
I mostly got things that I figured would help me achieve cooler nails. We shall start with the 3D nail studs and stuff:


I bought bows! ^_^ 10 lavender/pink and 10 baby blue. Each have a rhinestone in the middle of the knot. These you would need glue to apply. They were 3 dollars a bag.


Small silver rhinestones. For fine detail work and a little bit of bling! They were about 2 bucks.


gold studs! About 5 bucks a bag for these guys. They're shinier in person.


Nail dotting tool (sorry for crap picture). About 2 dollars. I was tired of toothpicks, and this was a necessity for me.


I bought a little dish to hold rhinestones and things, and it came with a wax pencil to pick studs up with. With my clumsy hands, I needed this too. It comes with a tube of glue for studding things other than fingernails, so I need to get another glue. 

Bird is the word!

I also bought other things that intrigued me, mostly for my phone:


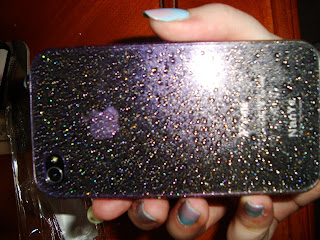
Holographic glitter case, would look better on a white case


This is a plug you put into your headphone jack so dust and things will stay out. It's adorbs!

All and all, BornPrettyStore is a great site to buy tons of stuff under one roof, with pretty cheap prices. I will be buying again soon!

--

UPDATE: there will be no nail of the week this week. I currently hate the state of my nails, and the current manicure I tried sucks ass. I will post something next week on that!

Friday, March 15, 2013

Nails Of The Week: Cotton Candy/Unicorn/Teenage Dream Bliss

Posted by Stephzilla at 8:11 PM 0 comments
Hey guys!

This week, I decided I wanted to do a manicure that was very spring-like and fun, considering spring starts next week! I wanted to do a sunset with palm trees, but wanted to do something I don't normally do, which is....

Gradients.

I love gradients as is, but on nails, I have had a pretty nasty track record. This go, however, I felt was cute!

To start, you will need:
  • A light blue polish
  • A pastel pink polish (a less opaque polish is best)
  • A pink glitter polish, or a clear polish with glitter in it (to help blend the colors)
  • Q-Tips
  • Nail polish remover (to clean up if you go overboard)

So we would want to start with the light blue polish. I used one of my favorite polishes, Obsessive Compulsive Cosmetics in "Pool Boy". It's a perfect robins egg blue! Paint the entire nail in this color, 2 coats for opacity.

See, it's so bright!

You'd want to let that sit until it's mostly dry. If it's still wet, the cotton on the Q-Tip will get stuck to your nail, and create a huge mess. Once it's dry enough, grab your pastel pink polish. I'm using this random pink polish I had (I seriously took out like 7-8 different pinks to find a combo I liked)


I don't have pics of the actual process, but it's easy. You take a Q-Tip and rub the cotton part on the brush with the paint on it, so it transfers to the Q-Tip. Then stamp it on your nail softly, from the free edge of the nail (the nail tip), to about halfway up the nail. You don't want to press too hard at first, because all the color will end up in one spot and you'll have dots. You'd want to lightly tap onto the nail to make it look speckled. Do that on all nails, grabbing more polish as needed til you have all 10 done. Then wait a bit for it to dry.

Once it's dry, you'd want to do the same thing again, except concentrate on tapping on the free edge of the nail. This is where you'd want to start building color up, as in making it more pink than blue. Continue on all 10 again. There's no formula as to how much or how little you tap, you need to eyeball it which also helps with making the manicure your own. Wait again for it to dry.

Almost done, most of your nail should be dry. One last time, focus on the very bottom of the nail, and go over it one more time if it needs it (if you pressed hard on the last pass, you might not need it). As I said, eyeball it!

Next to last step, take your glitter polish and tap it all over the pink part of the nail. I'm using OPI's "Princesses Rule!" (this is a pink shimmery color, not necessarily glitter)


We use the glitter as an added touch and it helps to complete the gradient. Once all of that is dry (phew)  hit it with your top coat and you're done. Clean up with nail polish remover if necessary, like if you hit your cuticle instead of the nail a few times. 

You should get something like this, before I put cuticle oil on 
(I never clean them. I'm a loner Dottie, a rebel...):


Maybe it's not a true gradient, but in person it looks like one. It takes a bit of practice to get the pressure right and the look down. This is perfect for princesses, unicorns, ponies, and fairies! It also reminds me of Katy Perry's album Teenage Dream

That's it for this week's mani, stay tuned for next week! 


Sunday, March 10, 2013

REVIEW: Wet N Wild- I Need a Refresh-Mint

Posted by Stephzilla at 8:35 PM 0 comments
Hey guys!

A few weeks back, drugstore.com had a sale on everything in their beauty department was 30% off, and I tend to buy my essential beauty things during these sales. I was a couple dollars off of free shipping, so I put this guy in my cart:


I was hoping with a name like "I Need A Refresh-Mint", it would actually be a mint color. To my surprise, it was more of a blue than a green, and more turquoise color.


ManiCurve brush ya say? What's so magical about it? I was a bit skeptical.  I'm a bit of a brush snob, I hate thin brushes. Well I would still use them, but I like brushes where I could do 3 swipes at most to cover the nail.
I opened up the polish and this is what I saw:


It's a big, burly thing. Not going to lie, it kind of intimidated me haha. I feared it would be too big and there would be polish everywhere, which could be a nightmare. But then I realized, this brush looks extremely familiar...


Very similar to Sally Hansen's complete salon manicure brushes. Would it be naive of me to say that this is a semi-dupe of design? 


Sort of. 


I started painting. For a drugstore polish, it's very opaque and pigmented. You could easily get away with one coat of this stuff, but for full opacity you should go with two. Above picture is 1 coat, not cleaned up (I don't fully clean them up anyway, why be so pristine?)

The formula is extremely smooth as well. This could be due to how new it is, but the polish went on easily with no tugging. The brush on these are AMAZING in my opinion. I know some people complain that the brush is too big for their nail beds, but with precision you can cover the entire nail in one swipe. 

Flash
Painting them, I realized that this reminded me of China Glaze's "For Audrey", which I wanted to buy for years, but then it also reminded me of Zoya's "Wednesday", which is one of my favorite polishes of all time. Here's the comparison (with Zoya anyway)

L: Zoya "Wednesday". More of a green teal, WnW "I Need A Refresh-Mint" on the right.
It's more blue but both are similar in characteristics
Because I'm a freak, I did swatches of both too:

Close, but no cigar
And I stuck it next to Obsessive Compulsive Cosmetics' nail polish in "Pool Boy" for the hell of it:

ISN'T THIS A COLOR COMBO TO DIE FOR?! I have a few ideas for this!

In conclusion, so far I really like this polish. I've had it on for a day, and my nails are still looking good. From feeling it though it feels like it will last a week, even though their site claims a solid 5 days worth of wear (I know that sounds crazy but sometimes I can tell how long a polish lasts by how it feels on the nails). It "feels" like Zoya's formula! Nice and sleek. This stuff would have easily lasted more than a week if I didn't get bored with it.

I got this polish for $1.99 at drugstore.com (but you can get it at most drugstores!), and it's worth checking out both for its price and performance. If you want a good bang for your buck without forking out $8-9 dollars for high end polishes, this is for you. However, the brush may be a turn off. The color selection is pretty extensive too for a line like this.

 Product Website


Zilla's Claws Copyright © 2012 Design by Antonia Sundrani Vinte e poucos